If you’re dealing with a flooded sub-floor right now, take a breath. You can get through this, and the steps below will show you exactly what to do. Subfloor drying in Perth is something Flood Services Perth handles every day, and this guide walks you through the same process our specialists follow for floor drying service from the moment they arrive on site.
The most important thing you need to know right now: time is working against you. Mould can begin forming within 24 to 48 hours of a water event. Acting quickly is the single biggest factor in how much of your floor can be saved and how much will need replacing.
Why a Wet Sub-Floor Is More Dangerous Than It Looks
A wet sub-floor isn’t just a damp patch. It’s a structural problem that worsens every hour you wait.
Most homeowners assume the danger is limited to what they can see. But water moves. It travels through gaps, between boards, beneath tiles, and into the timber joists and bearers that hold your floor together. By the time the surface feels dry, the structure underneath may still be saturated.
Here’s what happens when a sub-floor stays wet:
- Timber joists and bearers begin to swell, then warp and crack as they dry unevenly
- Mould takes hold in the dark, warm, poorly ventilated space beneath your floor
- Sheet sub-floor materials like particleboard swell at the edges and lose structural strength
- Adhesives holding down hard flooring fail, lifting tiles and laminate from the inside out
- If the moisture reaches concrete footings, long-term structural instability can follow
The longer it sits, the more expensive the repairs. Emergency floor drying isn’t optional. It’s what protects your property from damage that can cost tens of thousands of dollars to fix.
Step 1: Stop the Water Source First
Before anything else, you need to stop the flow and remove standing water. Knowing how to dry subfloor quickly while water is still entering the space is pointless.
If the source is a burst pipe or appliance failure, shut off the water at the mains immediately. If it’s stormwater coming in through subfloor vents or from outside, identify how the water is entering and block it where you safely can. If the source is still active and you can’t stop it yourself, call a plumber before calling anyone else.
Once the water source is secured, document everything. Take photos and video of the affected area before you move anything. This matters for insurance purposes and your claim documentation.
Step 2: Remove Flooring and Access the Sub-Floor
In most flood situations, your surface flooring needs to come up. It has to, because leaving it in place traps moisture underneath and makes it nearly impossible to dry the sub-floor properly.
Pull up carpet, underlay, vinyl planks, laminate, or any floating floor covering. Timber floorboards may need to be lifted depending on the degree of saturation. Hard-set tiles are the exception, but even tiles often need to come up if the flood was significant, because moisture gets under the adhesive and into the sub-floor regardless.
Once the surface layer is removed, assess what’s underneath:
- Look for standing water in any sub-floor cavity
- Check for visible mould, discolouration, or warping in any exposed timber
- Note whether the moisture extends across the whole area or is concentrated in one zone
Step 3: Extract Standing Water
Once you have access to the sub-floor space, standing water needs to come out first. Dehumidifiers and air movers can’t do their job until the bulk water is gone.
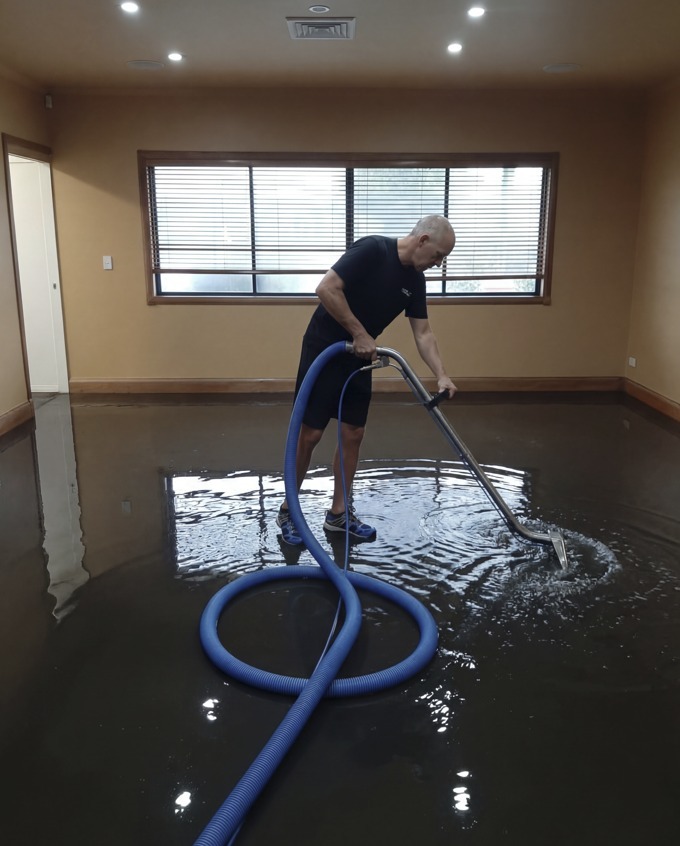
Use a wet/dry vacuum or an industrial extraction pump to pull excess water from any pooling areas. Professional grade truck-mounted extraction units remove water far faster than domestic wet vacs, which is why calling a professional subfloor drying in Perth for this step pays off in saved time and less damage.
Work systematically from one end of the affected area to the other. Don’t rush past edges and corners. Water pools in low points and collects against walls and joists. Check underneath any built-in cabinetry as well. Sub-floor water regularly finds its way into kitchen or bathroom kick spaces that aren’t immediately obvious.
Sanitisation matters here too. Stormwater, sewage-adjacent water, or any water that has passed over soil and debris is contaminated. If your flooding involved anything other than clean tap water, the extracted water must be handled appropriately and the sub-floor area treated with a suitable antimicrobial agent before drying begins.
Step 4: Set Up Airflow and Dehumidification
With standing water gone, you move into active structural drying. This is where the real work happens, and it’s where the difference between professional and DIY methods becomes most apparent.
Effective sub-floor drying relies on two principles working together: increased airflow to carry moisture away from wet surfaces, and reduced ambient humidity so that the air can absorb more moisture from the structure. You need both. Airflow without dehumidification just moves humid air around. Dehumidification without airflow doesn’t reach moisture locked inside timber or deep in a concrete slab.
Open windows and doors where possible to create cross-ventilation. For a raised sub-floor, open all perimeter vents to allow air movement through the cavity.
Step 5: Monitor Moisture Levels Until Dry
Drying our subfloor isn’t finished when the floor feels dry. It’s finished when moisture readings confirm the material has returned to safe levels.
Under the AS-IICRC S500:2025 standard for professional water damage restoration, the target moisture content for timber framing is 8 to 12 percent. For concrete sub-floors, the target is a relative humidity of 75 percent or below, measured with a sealed hygrometer box left on the slab for at least 72 hours.
Moisture must be checked at multiple points across the affected area, not just one central location. Thick timbers, dense hardwoods, and areas with restricted airflow will dry more slowly than the surrounding structure. Don’t assume the whole area is dry because one section reads correctly.
Daily readings during the drying period allow you to track progress and confirm the drying equipment is positioned effectively. If readings aren’t dropping, the equipment placement or capacity needs adjustment.
Reinstalling flooring over a sub-floor that hasn’t reached target moisture levels is one of the most common and costly mistakes homeowners make after a flood damage. The floor looks right. The surface feels dry. But three to six months later, timber boards begin to cup, laminate starts to buckle, and adhesives begin to fail. The moisture was still there. It just wasn’t measurable by eye.
How to Dry a Sub-Floor Without Removing Flooring
Sometimes removing flooring isn’t possible, practical, or necessary, particularly for smaller water events caught early.
The key tool here is an injection drying system. Systems like the Injectidry HP-PLUS use panels placed directly on the surface of the floor, connected to an air mover, to create controlled airflow between the flooring layer and the sub-floor beneath. This creates negative pressure that draws moisture out of the structure without lifting a single board.
For tiles, small holes can be drilled through grout lines to allow airflow beneath the tile bed. The grout lines are re-filled once drying is complete, which is far less disruptive than removing and replacing entire tile sections.
This method works best when the flooding was clean water, caught quickly, and the sub-floor hasn’t been saturated long enough to cause structural warping. If there’s any standing water in the sub-floor void, or if the timber has already started to warp or swell, flooring removal is typically still necessary to achieve proper drying.
A thermal imaging camera scan before committing to in-place drying will tell you whether moisture has spread further than the visible area, which affects which method is the right call.
How Long Does a Sub-Floor Take to Dry?
The honest answer is: it depends. Several variables affect drying time, and anyone who quotes you a fixed number without assessing your specific situation is guessing.
That said, here’s a realistic guide based on industry experience:
- Minor water event, timber sub-floor, caught within hours: 3 to 5 days with professional equipment
- Moderate flooding, raised timber sub-floor: 7 to 14 days
- Heavily saturated raised timber sub-floor, poor ventilation: 2 to 4 weeks
- Concrete slab, significant flood event: 3 to 8 weeks with dehumidification
- Concrete slab, no mechanical drying: Up to 4 months
Factors that slow drying include:
- Restricted access to the sub-floor void
- High ambient humidity (particularly relevant in Perth during winter and storm events)
- Dense or thick timber species, such as hardwood, which hold moisture longer than pine
- Poor ventilation to the sub-floor cavity
- Contaminated floodwater that requires sanitisation before drying begins
Factors that speed it up:
- Immediate extraction of standing water
- Commercial air movers and industrial dehumidifiers running continuously
- Heat drying introduced into the sub-floor space
- Open perimeter vents allowing cross-flow ventilation
- Daily moisture monitoring with equipment repositioned as needed
Never rush the process. Reinstalling flooring before the sub-floor reaches safe moisture levels leads to the same structural damage you were trying to prevent. A few extra days of drying saves months of remediation work later.

Conclusion
Sub floor drying after a flood is a multi-step drying process that demands the right equipment, the right sequence, and the patience to monitor moisture levels until the job is genuinely done. The steps above cover how to dry your sub-floor properly: stop the water, access the structure, extract standing water, run active drying equipment, and confirm moisture levels before reinstalling anything. Get these right, and your floor has the best possible chance of a full recovery.
Flood Services Perth provides 24/7 emergency flood restoration and sub floor drying in Perth metro area, arriving on site within an hour of your call. If your sub-floor is wet right now, call us on 08 9468 8413 or book us online today! The sooner we start, the more we can save.